

Stepping into my kitchen feels like stepping into a world of magic, especially when preparing something as simple yet delightful as No Yeast No Oven Easy Pita Breads. This recipe has become a staple in my culinary adventures, allowing me to create soft, pillowy flat breads without the hassle of an oven.
These pitas are incredibly easy to make, and their versatility makes them perfect for a wide range of meals—whether a hearty breakfast or a sumptuous dinner. The best part? With the right tips, you can get them to puff up like balloons, making them a hit every time I need fresh bread at home.
Why You’ll Love This Recipe
No Yeast? No Problem!:
This recipe is all about ease—no waiting, no rising time, just quick and effortless bread making. By using baking powder instead of yeast, these pita breads come together in a straightforward way, saving time while still delivering soft and delicious results.
Skip the Oven – Cook on a Stovetop
You don’t need an oven to enjoy these pita breads—just a pan! Whether you use a heavy bottom griddle for even heat or a non-stick option for ease, this recipe fits any kitchen setup. The making process is simple, and the results are always perfect.
A Versatile Bread for Any Occasion
These pita breads are incredibly versatile—they can be served with hearty dishes, used to make delicious sandwiches, or simply enjoyed with your favorite dips. Their soft texture and neutral flavor make them a great addition to any meal.For example, you can pair them with Easy Sis Tavuk for a flavorful and satisfying meal.”
Ingredients for Easy No-Yeast Pita Bread:
- 1/2 cup plain yogurt for a soft texture
- 1 cup lukewarm water to bring the dough together
- 2 tsp baking powder to help with fluffiness
- About 4 cups all-purpose flour for structure
- 1 tsp salt to enhance the flavor
- 1 tbsp olive oil for richness and elasticity
- More flour to shape the dough easily
- More olive oil if preferred for brushing before serving
- Adjust with more ingredients as needed for the perfect consistency.
| Ingredient | Amount | Purpose |
| Plain Yogurt | 1/2 cup | For a soft texture |
| Lukewarm Water | 1 cup | To bring the dough together |
| Baking Powder | 2 tsp | Helps with fluffiness |
| All-Purpose Flour | About 4 cups | Provides structure |
| Salt | 1 tsp | Enhances the flavor |
| Olive Oil | 1 tbsp | Adds richness and elasticity |
| Extra Flour | As needed | Helps shape the dough easily |
| Extra Olive Oil | Optional | For brushing before serving |
Step-by-Step Guide to Making Pita Bread
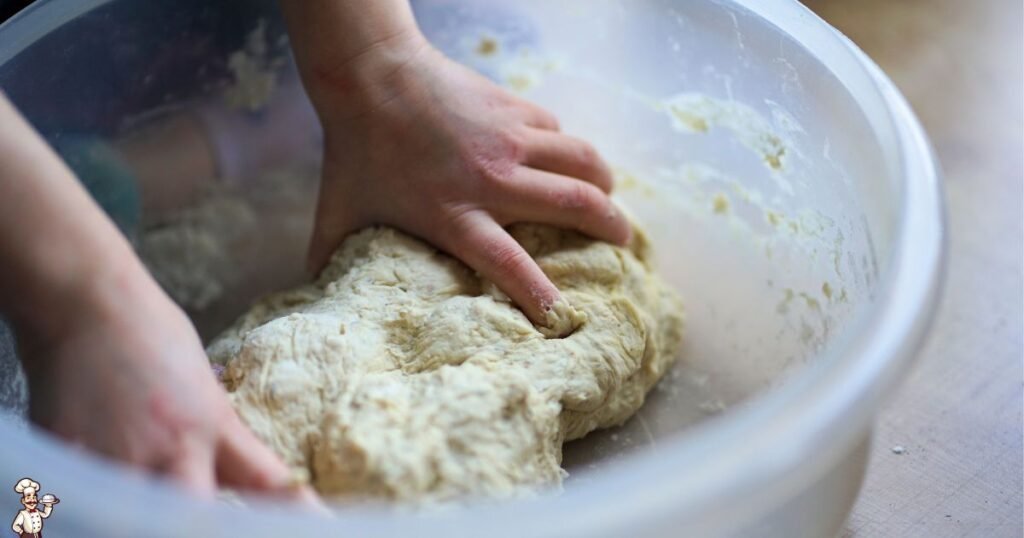
How to Prepare the Dough:
- Add 1/2 cup plain yogurt and warm water to a mixing bowl
- Skip yeast and instead use baking powder in the mixture, then stir well
- Pour in 3 and a half cups of flour, followed by 1 tsp salt
- Mix everything with a wooden spoon until the dough mixture starts coming together
- Once too thick to stir, knead with your hands, adding left over flour as needed
- Work the dough until it is soft and playable, then let it rest for 10 minutes.
Shaping and Cooking Your Pita Bread:
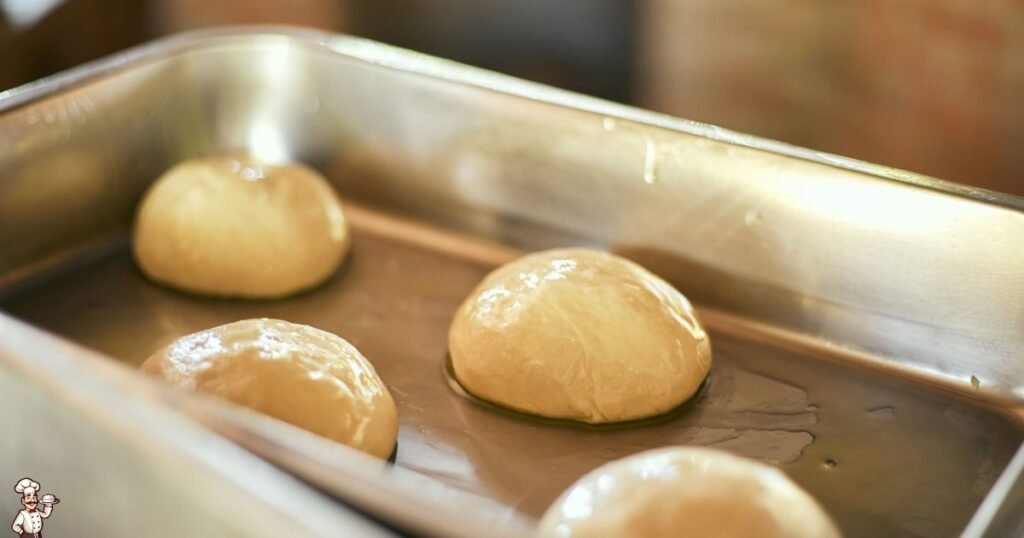
- Cut the dough into 12 pieces and shape each into small balls for even cooking.
- Roll out the dough to 15 to 20 centimeters in diameter to get the perfect size.
- Cook these easy breads like bazlama on a cast iron griddle pan or a regular non-stick pan.
- Cover the dough with a damp cloth while baking to keep it from drying out.
- Follow simple tricks—ensure the heat is medium high and flip the breads when bubbles appear.
- Keep them soft by brushing with oil before serving or covering them after cooking.
Pro Tips for Soft and Fluffy Pita Bread
The Right Heat for the Perfect Puff
To ensure your pita breads turn out just right, your pan must be well-heated before starting. The right temperature is crucial for getting that perfect rise, allowing the dough to puff beautifully while keeping the inside soft and full of texture.This technique is similar to what you’d use when preparing Turkish Kir Pide for a perfect, fluffy result.”
Keep Your Pita Soft and Moist
To keep pita breads fresh and soft, always cover them with a damp cloth right after cooking. This simple trick keeps them warm and prevents them from drying out, ensuring they are ready to serve whenever you need.If you’re also interested in keeping other baked goods fresh, check out The Ultimate Guide to Homemade Sourdough Bread for expert tips.
Serving Ideas: How to Enjoy Your Pita Bread
These pita breads are incredibly versatile and can be enjoyed in many ways. Serve them with a traditional Turkish breakfast for a hearty start to the day, or fill them with your favorite sandwich ingredients for a quick meal. They also pair beautifully with main dishes, making a delightful side to complete any spread.
The Secret to Soft and Puffy Pita Breads
Making No Yeast No Oven Easy Pita Breads is all about the right technique. A well-heated pan is crucial for achieving the perfect puff and maintaining a soft texture inside. Always preheat your cast iron griddle pan or regular non-stick pan on medium-high heat before cooking.
Once the breads are placed on the pan, wait for bubbles to appear before flipping to ensure even cooking. This method helps create airy pockets inside while keeping the exterior light and golden.
Keep Them Soft and Fresh
To prevent the pita breads from drying out, always cover them with a damp cloth immediately after cooking. This simple trick keeps them warm and soft until you are ready to serve. Brushing the surface with a little olive oil also helps maintain moisture and adds a subtle richness.
If you plan to store them, wrapping them in a clean kitchen towel or an airtight container will preserve their freshness for hours.
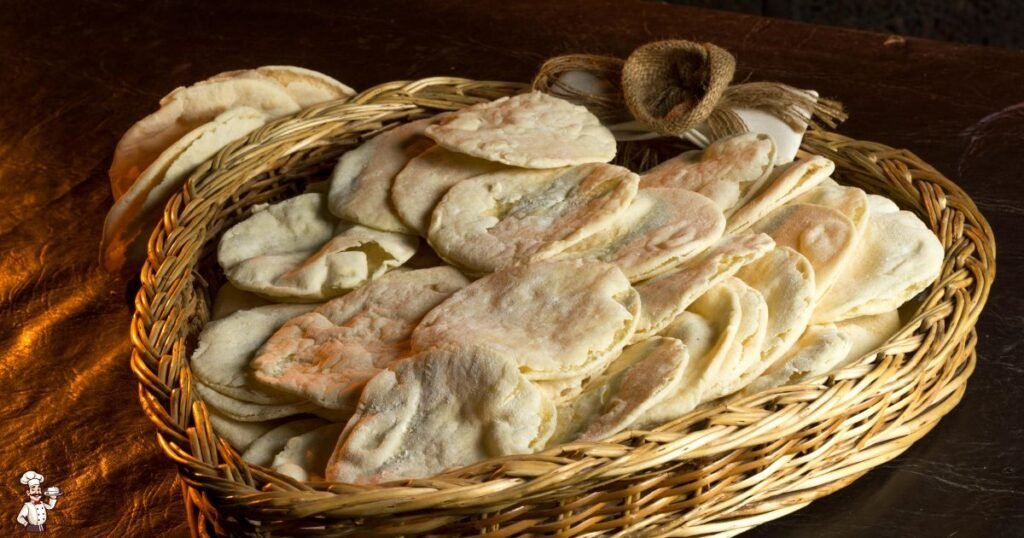
How to Enjoy Your Pita Breads
These versatile pita breads can be enjoyed in many ways. Serve them as part of a traditional Turkish breakfast, fill them with your favorite sandwich ingredients, or pair them with main dishes as a delightful side. Their soft and airy texture makes them perfect for dipping into hummus, stuffing with grilled meats, or simply enjoying with a drizzle of olive oil. No matter how you serve them, they will always be a comforting and delicious addition to your meal. Afiyet olsun!
Frequently ask question
Can I make these pita breads without yogurt?
Yes! You can replace yogurt with an equal amount of milk or water, but yogurt adds softness and a slight tangy flavor to the dough.
Why aren’t my pita breads puffing up?
Ensure your pan is well-heated before placing the dough. Also, rolling the dough evenly and cooking at the right temperature helps create air pockets.
Can I store these pita breads for later?
Yes! Wrap them in a clean kitchen towel or place them in an airtight container to keep them soft for up to 2 days. For longer storage, freeze them.
Can I use whole wheat flour instead of all-purpose flour?
Yes, but the texture will be denser. You can mix half whole wheat flour with all-purpose flour for a balance of softness and nutrition.
What can I serve with these pita breads?
They pair well with hummus, grilled meats, Turkish breakfast spreads, and dips like tzatziki or baba ganoush.
How can I reheat pita breads?
Reheat in a pan for a few seconds per side or wrap in a damp towel and microwave for 10-15 seconds to restore softness.
Can I cook these pita breads on a gas stove without a pan?
It’s best to use a pan for even cooking, but you can briefly place them over an open flame for a charred, smoky taste.
Do I need to let the dough rest before cooking?
Yes, resting for 10 minutes allows the dough to relax, making it easier to roll and cook evenly.
What makes these pita breads soft and fluffy?
Using baking powder, yogurt, and proper heat control helps achieve soft, airy pita breads without yeast.
Can I add herbs or spices to the dough?
Absolutely! Adding garlic powder, dried oregano, or black sesame seeds can enhance the flavor and give a unique twist.
Conclusion
Making No Yeast No Oven Easy Pita Breads is a simple yet rewarding experience, allowing you to enjoy fresh, soft, and delicious bread with minimal effort. Whether you’re looking for a quick side dish, a sandwich base, or a perfect pairing for dips, these versatile pitas fit any meal. With the right techniques—like heating your pan properly and keeping the breads covered after cooking—you can achieve beautifully puffed and tender results every time. Best of all, this recipe requires no yeast or oven, making it an accessible and convenient option for home bakers. Give it a try and enjoy the taste of homemade goodness!

Chef Ceren Narin is a passionate food lover and traveler dedicated to sharing authentic Turkish cuisine. As the founder of TurkishYum.com, she explores traditional flavors, recipes, and culinary heritage, bringing the magic of Turkey’s food culture to your kitchen.